Tag Archives: yoga

From the founder of YogaFit…

It’s time for a ZENtervention. We at YogaFit and YogaLean are here to revitalize society. Physically. Mentally. Spiritually. To empower all people, no matter who you are, to achieve wellness, and in doing so, to transform lives for the better.

It’s as much a personal journey as a far greater one. Because the better we feel – as individuals, communities, and society as a whole – the more we can accomplish. Put simply, we want to bring wellness to the world.

What we offer is a new way of living, based on the philosophy of yoga, to transform yourself inside and out. It’s about creating and sustaining a balanced lifestyle that touches every aspect of how you live – from fitness and food to meditation and giving back – for realizing total mind body vitality. It’s what we call whole life wellness.

We understand that sometimes people need a catalyst to realize a more holistic approach to their overall wellness. We’ve developed YogaLean to do just that – YogaLean is principles for achieving optimum health and well being. YogaLean sets us on a journey to whole life wellness and positive transformation. It’s about taking the first step: thinking differently to live differently. Being more mindful – of your body, your home, and your time – to reach your optimum.

Over 17 years ago, Founder Beth Shaw pioneered the practice of teaching yoga. Embracing the physical exercise, then its wider philosophy – this was where the vision of For Better Self began.

Starting out of the trunk of her car with a passion to help people feel better and live life more fulfilled, Beth founded YogaFit, today the largest yoga fitness education school in North America. Beth’s work has helped thousands. Now, she aims to bring that knowledge, education, and best practice to all, making it simple and accessible. So everyone can be their better self.

Open Your Heart Chakra

Celebrate this Valentine’s Day by loving yourself!

Not only is this week Valentine’s Day, but it is also American Heart Month. To honor both of these (equally important) holidays, we’d like to share some ways you can practice some intro- spection and learn how to open and activate your heart chakra.

But what is a heart chakra, you might ask? It comes from the Sanskrit word for ‘wheel’ or ‘circle,’ and according to Hindu and Buddhist belief, chakras are defined as:

(n): any of the seven major energy centers in the body

Chakras are like pools of energy in our bodies which dictate our psychological traits. All seven chakras are located in various parts of the body. Four in our upper body, our mental chakras, and three in the lower body, which govern our instinctual properties.

According to Buddhist/Hindu teaching, our chakras should contribute to a human’s well-being. Our instincts would join forces with our feelings and thinking. If our chakras are out of balance, we will not enjoy peace within ourselves.

5 Poses that will open your heart chakra:
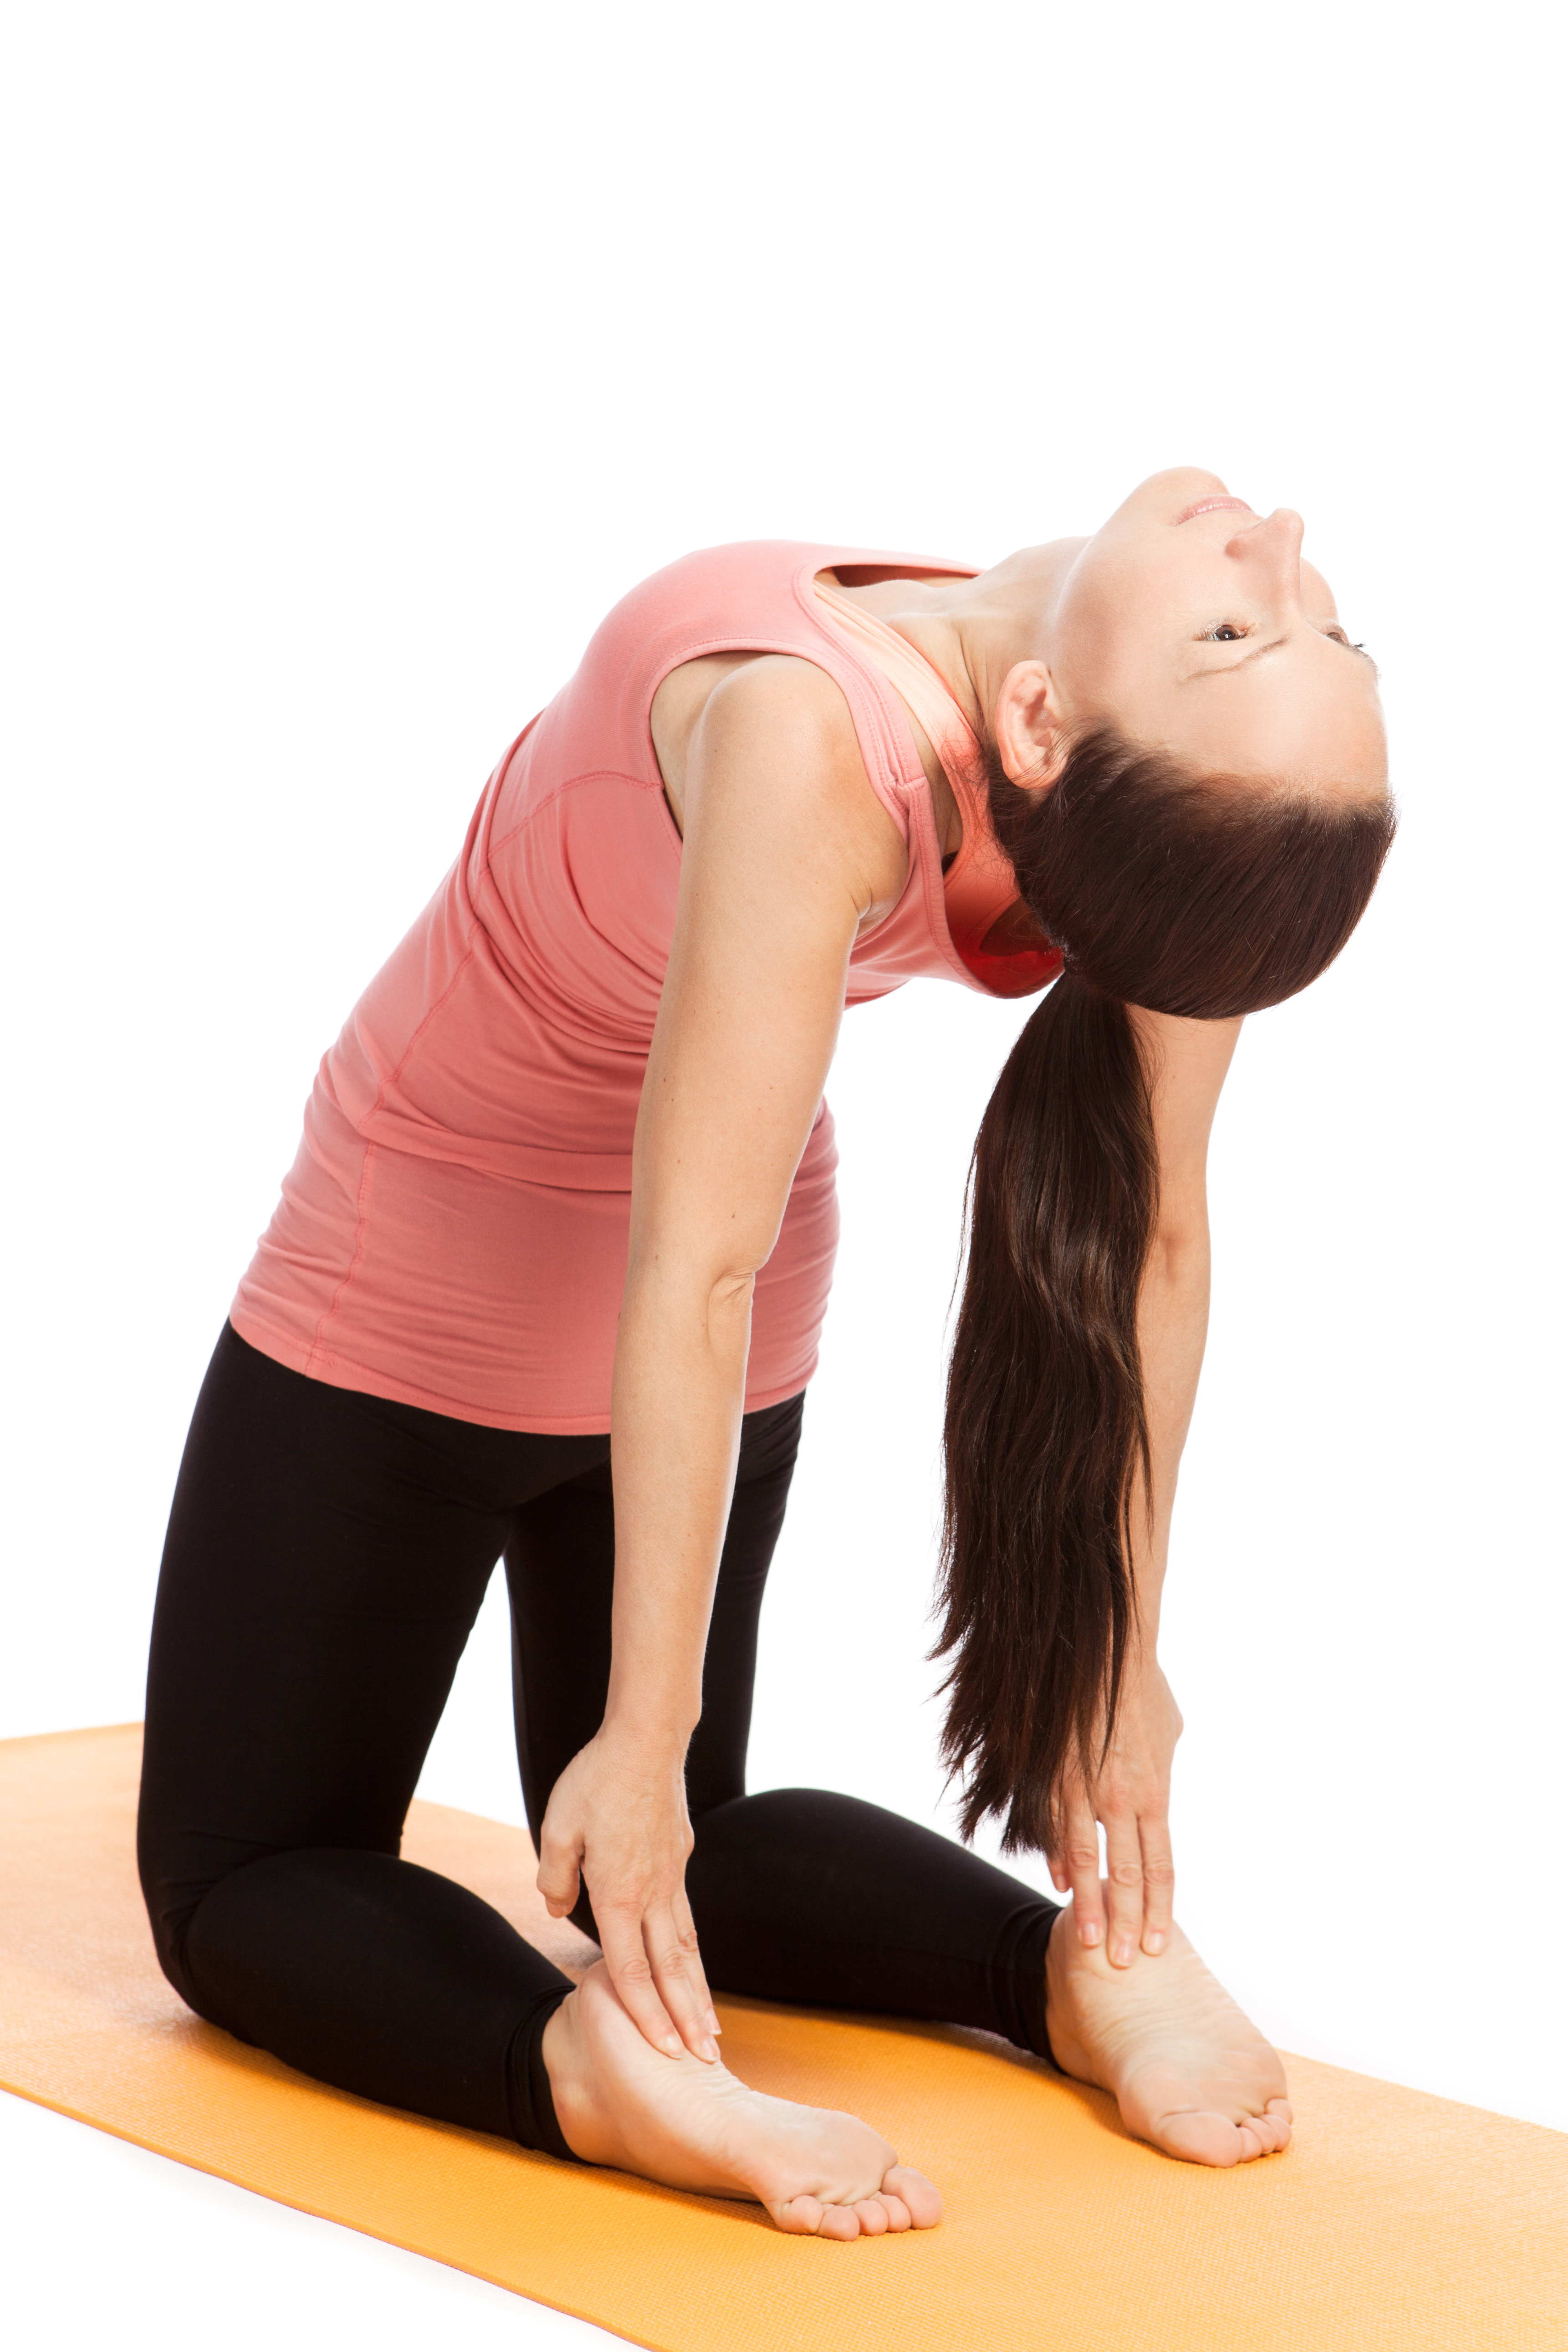
Camel Pose

Camel Pose

Ustrasana

This is an amazing opener that is energizing and cre- ates self-confidence and chi flow. It opens the heart center and counteracts the forward flexion that is part of daily living. This pose strengthens the gluten and the lower back as well as stretching the pectorals (chest), intercostals, hip flexors, and shoulders. Only do this pose when the body is warmed up, and always follow a back bend with a forward bend.

Getting into the pose:

Move slowly, feeling your way. From a kneeling posi- tion, place your hands or fists on the bony points alongside your spine. Firm your glutes. Push your hips forward and lift your chest to the sky.

Holding the pose:

Lift out of your lower back, drawing your elbows back to expand your chest. Take 3 deep breaths. If it doesn’t cause you any discomfort, drop your head back, eyes gazing directly up at the ceiling.

As you get out of the pose, go into Childs Pose. Rest.

Fish Pose

Fish Pose

Matsyasana

A powerful opener for the chest and heart center. This is a great pose to relieve bronchial congestion and asthma. It can also be done as a restorative pose by placing a rolled-up yoga mat or folded blanket under your back for more support. Fish pose strengthens your upper back and stretches your chest, throat, and shoulders. Fish pose is also an effective counter-pose for inversions. This pose can potentially alleviate certain chest disorders and promote a healthy heart. It is also said to stimulate the thyroid, increasing metabolism. Always precede and follow with Knees to Chest pose to stabilize your spine and the muscles in your back.

Getting into the pose:

From Knees to Chest position, lower your legs to the floor. Slide your hands under your hips, palms down, and bring your elbows toward each other under your body. Point your toes toward the floor as you reach back in the opposite direction with the crown of your head, shifting your body back slightly as well.

Holding the pose:

Lift your chest. Maintaining space in the back of your neck, relax. Your breath should feel deep and easy – if not, adjust your position.

Bridge Pose

Bridge Pose

Setu Bandha Sarvangasana

Bridge pose is an excellent way to stretch the front of the hips and open your chest, particularly if you sit for long periods or regularly walk, run, or cycle. Many people have tight hip flexors from too much walking, run- ning, cycling, or even just sitting and driving. Bridge pose also targets muscles deep in the lower back and hips that are difficult to reach when upright. This pose will strengthen your gluten, hamstrings, and abductors. Bridge will stretch your hip flexors, core, center, and pectorals.

Getting into the pose:

Lie down on your back, palms down. Slide your shoulders away from your ears. Bring the soles of your feet to the floor, hip-width apart. Press through your feet to lift your hips.

Holding the pose:

Keep your head still to protect your neck – don’t look around. Use your inner thighs to keep your knees in line with your hips and toes. Breathe deeply into your open chest and navel center. Turn the palms up for more chest opening and core focus.
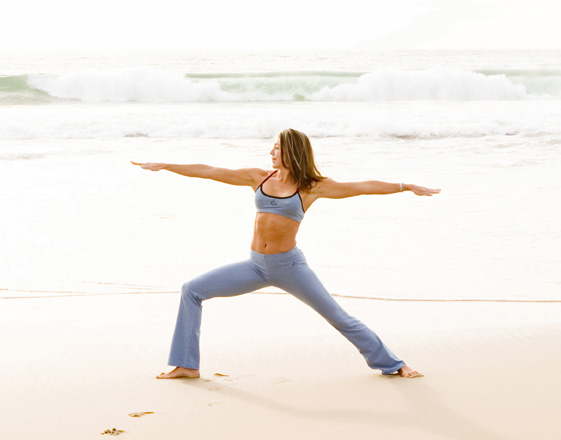
Triangle Pose

Triangle

This is one of my favorite yoga poses. It moves energy in four directions, originating from a strong center. Triangle strengthens the quads, the obliques, and the shoulders. Triangle also stretches the hamstrings, pectorals, and intercostals.

Your upper body is lifting and moving back while your lower body is sinking and moving forward. Triangle pose represents creating for ourselves a strong mental and physical foundation, represented by the two bottom points of the triangle. From here, we can begin to look up, exploring the third point – the spiritual.

Getting into the pose:

From the Warrior II pose, straighten your front leg. Reach forward, then lower your hand to your shin or ankle. Lift your back arm to the sky, opening your chest. Look up, down, or straight ahead, finding a comfortable place for your neck.

Holding the pose:

Press your feet away from each other, keeping a soft bend in the forward knee. Check that your nose stays over your leg, not in front of it. Engage your glutes. Breath length into your spine, allowing your inner strength to fuel your outer strength. Switch sides.

Final Relaxation

Final Relaxation

Savasana

This pose will give you an opportunity to check back in with your body and mind, mentally and physically integrating the benefits of your practice. It will also provide an important transition back into your daily routine. Finally, it will help release muscular tension and stress for better health and well-being.

Final relaxation is an integral part of any yoga practice and should never be rushed or skipped. Allow a minimum of 6-10 minutes for Final Relaxation.

Getting into the pose:

Lie on your back or in any position that allows you total comfort and relaxation. Turn your palms toward the sky and allow your feet to roll open.

Holding the pose:

Let your breath return to ist natural rhythmic cycle. Continue to release stress and tension, finding peace and calm.

Restorative Yoga 101: Relax & Renew

img-principle-6

Restorative Yoga is focused around the “ahhh” experience in yoga; the space found by breathing, relaxing and letting go of the mind’s internal dialogue. This gentle approach to practice allows participants to experience the same benefits of traditional practice while exerting little or no effort at all and leaves students feeling nourished, refreshed and well rested.

Prolonged stress, internal conflict, demanding situations, anxiety and anger engage the body’s natural “fight or flight” response which triggers the hypothalamus and initiates a sequence of nerve cell firing that prepares our bodies to react to perceived danger. Restorative Yoga engages our bodies’ innate ability to renew and restore, balancing and counteracting the effects of prolonged stress.

Restorative Yoga facilitates the four conditions for relaxation: relaxing the muscles with support, quieting the responses caused by stress, quieting the mind and finding a relaxed smooth breath.  Unlike sleep where your mind and body are preoccupied with dreaming and tensing muscles, Restorative Yoga provides an opportunity to achieve all four of these conditions.

The purpose of Restorative Yoga is two-fold. Restorative Active Poses awaken dull areas in the body to improve circulation and promote healing while Restorative Passive Poses induce deep relaxation and recuperation.

Some of the key adjustments to look for include maintaining round and soft lines in the body and avoiding sharp angles, readjusting props strategically to support the body, filling the space between the body and the earth and using enough props to create an even path for energy.  Most of the adjustments in Restorative Yoga involve accommodating and giving support to the body with props.  The basic props for Restorative Yoga are blocks, chairs, straps, bolsters and eye wraps.

Breathing during Restorative Yoga should always be easy and gentle, never forced or strained.  Restorative Yoga encourages students to become aware of the sensations and feelings of breathing and provides a chance to experience breath without muscular effort that brings about opening, healing and a calm state of mind. Sometimes students will access deep feelings locked in the mind/body and may experience catharsis.

Experience Restorative Yoga’s benefits to the mind and body with this balancing and rejuvenating routine.

Begin on your back with knees bent and the hands on the midsection.

Centering Breath, which consists of two gentle breaths, followed by one deliberately slow and thin inhalation and one deliberately long and full exhalation.

Bridge Flow with Block: Come to bridge pose, with the support of a block underneath the tailbone/lower lumbar spine.  Lift and lower hips, elevating when the lower hips are supported.

Abs with Block or Ball: Placing the block or ball between the thighs, 2-3 inches above the knees, engaging in abdominal work of you choice, which can include crunches or leg lifts, gently applying pressure to the block or ball.

Supported Bridge with Block: Placing a block or bolster beneath the feet and lowering back, relaxing the head down onto a blanket, opening the arms to either side.

Knees to Chest:  Lying down on the back, bringing the knees to the chest and holding on to the back of the thighs.

Childs Pose Restorative with Bolster: Beginning on all fours, pushing the buttocks back on to the knees and lowering the upper body down.  Chest rests on a bolster, completely relaxing, resting and breathing.

Cat/Cow with Block or Ball: Beginning on all fours, holding a block or ball between the thighs, 2-3 inches above the knees, for Cat Pose, rounding the back to the sky as the head lowers, and for Cow Pose, arching the back and lifting the chin.

Down Dog with Block: Coming to Down Dog, resting the forehead on a block or holding a block or ball between the thighs.

Crocodile / Plank Pose- Upper Body Warm Ups: For Plank, beginning in Downward Facing Dog and shifting forward until the shoulder are directly above the wrists.  Pressing the heels back and reaching through the crown of the head with the back straight and abdominals firm, moving to Crocodile Pose, pushing forward with your toes and hugging your ribcage below the elbows.  Lowering your chest, keeping your abdominals strong and hips stationary. Transitioning from Plank to Crocodile with Child’s Pose in-between.

Side Angle with Block: From a Warrior stance, bending your front knee and placing your forearm on a block on your thigh, reaching the top arm to the sky and alternating sides.

Sunflowers:  Stepping back to face the long edge of your mat, feet spread, turning the heals in and toes out, coming down to a squat while bending the elbows and placing them next to the waist, knees straight out over the toes.  On an inhale, moving the arms overhead and on an exhale hinging forward from the hips, reaching the tailbone back while maintaining a neutral spine as you sweep the arms to the floor.  Flowing with the breath through repetitions.

For more information about Restorative Yoga, register for YogaFit’s Restorative Yoga training at yogafit.com.

Yellow Eye Bean Salad with Sorghum

Beans are a great source of protein. I enjoy experimenting with different beans to bring variety into my diet. Yellow Eye Beans are high in dietary fiber and iron, low in sodium, and contain no sugar, saturated fat, or cholesterol. One cup of Yellow Eye Beans (boiled) is approximately 250 calories. This recipe can be made with another bean if you cannot find Yellow Eye Beans.

I hope you enjoy this light yet satisfying bean salad. The flavors and textures make each bite enjoyable. Serve with Gluten Free crackers or rolls if you wish to add carbohydrates to the meal. Traditionally Yellow Eye Beans are cooked with honey or molasses and are made into a baked bean side dish. I love this recipe as it allows the flavor of the bean to shine, rather than overpower it with sugar. If your local store does not have dry yellow eye beans, you can find them for sale on Amazon.

Enjoy this YogaLean recipe and find others at HealthyRecipeVariations.

Screen Shot 2015-09-30 at 10.52.21 PM

Base Ingredients:

2 cups of DRY Yellow Eye Beans

3 cups of water

3 cups of low sodium vegetable broth

1 bay leaf

4 cups of vegetables – cut in even sizes – I used a variety of bell peppers, onion, garlic, and sweet potato.

Olive oil for sautéing vegetables

1 cup of low sodium vegetable broth for preparing the vegetables

2 cups of spinach

1 cup Sorghum ( I use Bob’s Red Mill)

Screen Shot 2015-09-30 at 10.52.52 PM

Variations:

Substitute your favorite bean for the Yellow Eye Bean

Substitute red cabbage (diced) for the spinach

Substitute quinoa or millet for the sorghum

Vegetables: Staples include onion or shallot and garlic

Combinations can include:

mushroom, bell pepper, and basil

carrot, sweet potato, and tarragon

leek, sweet potato (or potato), and parsley


Instructions: After the beans are hydrated, it takes 30 minutes or less.

Rehydrate the beans (and bay leaf) in the liquid. I like to do this overnight.

After the beans have hydrated, slow cook them until they get soft…but still have an amount of firmness. The cooking stopping point is a moment to reflect on personal preference. If you want a little bite to your bean salad, stop cooking before the beans crack open and get soft. If you wish the soft texture to the bean salad, allow them to cook longer. Coking time is 1-2 hours.

Prepare the sorghum according to package directions (3 to 1 ratio). For the liquid, I use a combination of water and low sodium vegetable broth. This takes 30 minutes or so.

After the beans and sorghum are ready, dice the vegetables you wish to use.

Add the vegetables to a pan with 2 TBSP olive oil. Sautee and stir for 3 minutes then add 1 cup of low sodium vegetable broth. Allow the vegetables to soften some with the liquid.

When the liquid is almost absorbed by the vegetables, add the sorghum, and 3 cups of cooked beans. Stir.

Serve on a bed of spinach, stir spinach in the mixture and serve, or put the mixture in a “to go” container and take with you as a work-day lunch!

The dish is wonderful warm or cold. Garnish with sesame seeds or sunflower sees for added texture!

Screen Shot 2015-09-30 at 10.52.52 PM

Spinach Quinoa Salad

Quinoa is a complete protein that is very versatile. When paired with spinach, kale, or mixed greens it can become a satisfying main dish salad that provides protein, fiber, Omega 3’s, and anti-inflammatory nutrients.


Quinoa, like risotto, is a great way to use up small amounts of vegetables that you have left in the kitchen.  If you cook the quinoa ahead of time, you can sauté vegetables to create your desired flavor profile and add some cooked quinoa at the end of the cooking process.


In this dish I used okra, onion, garlic, zucchini, and sweet potato. Experiment with the flavor profiles that you prefer, perhaps trying a new vegetable in a small portion in a dish like this to see if you like it and wish to add it to your repertoire.


Enjoy this YogaLean recipe after a workout. Pair it with a Gluten Free roll or crackers. For a beverage, water with lemon or herbal tea (hot or cold) would be a nice pairing with this salad. Read other YogaLean Gluten Free recipes at Healthy Recipe Variations.

Base Recipe Serves 2:

I Cup COOKED QUINOA

3 Cups Evenly Diced Vegetables…the smaller the cuts the better  

4 TBSP Olive or Walnut Oil

1 Cup Vegetable Broth (low sodium)

4 Cups Baby Spinach


Garnish:

Basil, Rosemary, Tomatoes, Dried Fruit, Seeds or Nuts

Instructions:

Cook the quinoa according to package directions. I like to substitute low sodium vegetable broth for half of the water.

Evenly dice the vegetables and sauté them in chosen oil.

Add the broth and let the vegetables steam until the broth is almost absorbed. This leaves the vegetables el-dente if you cut them thin enough.

Add the cooked quinoa and stir to combine.

Rinse the spinach and pat dry. Divide evenly between two plates.

Top with the quinoa mixture in the center of the bed of spinach.

Serving Suggestions:

Garnish with seeds and nuts for added crunch if you wish.

Add dried fruit for a sweeter garnish.

Add tomatoes if you wish a touch of acidity.

Top with basil or rosemary, if you desire, for additional flavor.

You can top with oil and vinegar or allow the moist quinoa mixture to flavor the salad. 

Red Cabbage Salad with Vegetables and Basil

It is much easier to eat a Gluten Free and maintain a YogaLean lifestyle if you plan ahead. Salads can be a great meal or side dish but can be a detriment as well if you do not make good choices. They need not be laden with heavy dressings to be appreciated. Opt for seasonal vegetables, fruits, and lean proteins or nuts to be the star of the dish rather than a dressing.

Salads do not have to be constructed with a base of lettuce. Many other “greens” can be used as a base. According to studies, cabbage is a great vehicle to use as it provides the body with Calcium, Iron, and Potassium. It is a very good source of Dietary Fiber and Vitamin C.

I like to include a variety of colors, textures, flavors, and food groups to my salad to provide a satisfying meal or, if a smaller portion is served, accompaniment to a meal.

My inspiration for cabbage salads began with the idea of modifying coleslaw. I appreciated the intricate dice and the firm texture of the cabbage but did not particularly enjoy the dressing. At home I began experimenting with the diced cabbage with an oil and vinegar dressing and was hooked.

Cabbage comes in both green and red varieties. I look for a firm head of cabbage when I go shopping. Experiment with either red, green, or a multicolor cabbage salad next time you wish a salad as a meal or a side dish. Enjoy this Gluten Free YogaLean recipe as you look to make healthy food choices while keeping up an active lifestyle.  More Gluten Free recipes can be found on my blog at http://healthyrecipevariations.blogspot.com/.

Red Cabbage

Base Recipe for a Side Salad (double and add protein if being used as a meal):

1-1.5 Cups of Diced Cabbage

1 Cup of Diced Seasonal Vegetables

2-4 TBSP Oil and Vinegar Dressing

Optional Ingredients:

2 TBSP Fresh Basil (used here) or Rosemary

Crushed Red Pepper Flakes (1 TBSP or to taste)

2 TBSP each of any of the following: Sesame, Pumpkin, or Sunflower Seeds

Red Cabbage 1

If converting to a meal …. PROTEIN additions:

1 Cup of Nuts

1 Cup of Lean Meat (thinly sliced)

1 Cup of Tofu (I prefer pan fried)

1 Cup of Cheese

1 Hard Boiled Egg


Dressing Options (use 2-4 TBSP):

Oil and Balsamic Vinegar

Oil and Balsamic Vinegar + Pesto

Oil and Balsamic Vinegar + Sriracha

Oil and Balsamic Vinegar + Honey Mustard

Red Cabbage 2

Spinach Salad with Figs, Walnuts, and Brie

A salad can be an accompaniment to a meal or can be a meal itself. The portion size determines everything – salads are a great way to incorporate seasonal fruits and vegetables into your meal. If you are making your salad and entrée, make good choices to ensure you have a balanced meal and include protein and carbohydrates.


I find the keys to success with a salad include bold flavors, multiple textures, and a variety of food groups.


This salad can be a meal or a side dish. If using as a meal, you may wish to serve gluten-free crackers on the side or gluten free cornbread. If the figs are very ripe and juicy, you may not need salad dressing. If you do need dressing, I suggest a simple oil and vinegar so that the flavor of the fruit and brie stands out, not the dressing.

Figs are a great find when they are in season. They are low in calories while high in dietary fiber and antioxidants. Research shows the chlorogenic acid helps lower blood sugar levels and control glucose; an important factor for those with adult onset diabetes.


Base Ingredients:

Spinach

Fresh Figs

Brie

Walnuts (another soft nut like pecans can be used instead)

Screen Shot 2015-09-08 at 11.33.57 AM

Optional:

Oil and Vinegar Dressing

Add diced dates for flavor and texture


Enjoy this YogaLean recipe and other gluten-free recipes at Healthy Recipe Variations

Protein Packed Belgian Waffles and Seasonal Fruit

Some days we have more time for breakfast than others. On those rare occasions when I can sleep in and have a leisurely breakfast before starting my day, I enjoy making Belgian Waffles. This is a treat as each waffle takes a few minutes to cook, each flavor is a delight and wants to be savored, slowly, and it is a filling meal.


Belgian waffles are weekend and holiday treats. I usually follow them by a workout. I cannot think of a better way to spend the day…unless it was to share the meal and workout with all my family and friends!


Enjoy this Gluten Free YogaLean Meal and find other Gluten Free recipes at http://healthyrecipevariations.blogspot.com/.


Base Ingredients:

NOTE: This recipe reflects a modification of “Easy Waffles” from the Pamela’s Products Website.


1 cup Pamela’s Baking & Pancake Mix

1 cup Flaxseed Meal (I use Bob’s Red Mill)

2 Eggs

3 /4 Cup water or milk of your choice…I tend to use Almond Milk here

1 scoop Vanilla Protein Powder (Gluten Free) or 1 TBSP Vanilla flavoring, Almond Flavoring, or Maple Flavoring.

Waffles 1

Optional Batter Stir-Ins:

Berries, Dried Fruit, Chopped Nuts, or Chocolate Chips

Optional Toppings:

Fresh Fruits

Fresh Fruits and Nuts

Honey (instead of syrup)

Peanut Butter + Jelly or Fruit or Dark Chocolate Chips

Coconut Butter + Fruit (Fresh or Dried)

Waffles 2

Instructions:

-Combine ingredients in a mixer and stir until all lumps are removed.

-Pre-Heat waffle maker

-Add batter to waffle maker…start in the center so it does not ooze out the edges!

-Cook until the indicator on your waffle maker says it is done

-Add toppings and serve

NOTE: Leftover waffles can be stored in an airtight container. They reheat best in a toaster oven or oven. Leftover batter can be stored in an airtight container for about 5 days.

Waffles 3

Amaranth Fruit and Nut Cereal

Amaranth is a complete protein. It is a YogaLean way to start your day. You can customize the flavor profile so that you can make this dish day after day and it does not have to be the same. The nutritious grain comes from a fast growing plant related to beets, chard, spinach, and quinoa.

Texture is important to many people. This cereal can be made dry or have a liquid/runny content depending on the amount of liquid used. The consistency this recipe produces can be related to tapioca or cream of wheat.

Enjoy this Gluten Free Breakfast and find other Gluten Free recipes at Healthy Recipe Variations.  

Screen Shot 2015-08-24 at 2.58.25 PM Screen Shot 2015-08-24 at 2.58.38 PM Screen Shot 2015-08-24 at 2.58.51 PM

Base Ingredients (Serves 2)
1 Cup Amaranth (I use Bob’s Red Mill)
2 Cups Water (or milk of your choice)

1/ 2 Cup Almond Milk
1 TBSP Flavoring (I suggest Vanilla, Almond, Maple, or Cinnamon)

NOTE: I started with some pre-cooked Amaranth. The recipe calls for 3 cups of water to 1 cup of Amaranth. I used 3 cups of water to partially cook 2 cups of Amaranth. This technique allows me to use the amaranth in a variety of recipes throughout the week, and cuts down on preparation time when I wish to make the additional meals.  I used 2 cups of partially hydrated amaranth and added 1 cup of almond milk to a pot. I added 1 TBSP ALMOND flavoring and cooked until the almond milk was almost absorbed.  Then I added 1 cup of fresh dates stirring until all liquid is absorbed.


It was suggested I try Almond Flavoring when cooking with figs…I fell in love when I took that suggestion!


Fruit and Nut Options: (Seasonal Fruits are More Flavorful)

Figs, Bananas, Almond Flavoring, and Walnuts

Berries and Vanilla

Dates and Cinnamon

Dried fruits and nuts w/ flavoring of your choice

Stone fruit, vanilla, and pecans

Mango, coconut, and coconut flavoring

Pumpkin, pumpkin pie spice, and walnuts or pecans


Instructions:

Combine the ingredients (minus the fruit and nuts) in a pot.

Bring to a boil then reduce heat to a simmer. Stir from time to time.

When liquid is almost absorbed, add the fruit and nut combination of your choice and stir until the liquid is absorbed.


Cooking time: 30 minutes if amaranth is dry, 15 minutes if partially cooked.

Gluten Free Breakfast Crepes

Once I find something I like, I have a tendency to eat the same thing day after day. Therefore, I make a concerted effort to discover new recipes and modify them to diversify my meals! The Gluten Free Breakfast Crepe is a modification of a recipe I found on the website for Pamela’s Baking and Pancake Mix. This YogaLean meal is a great way to start your day! The beauty of the crepe is that you can fill it with a variety of ingredients. Each crepe you make for yourself can be different and each crepe made for a family can be filled with ingredients that fit personal tastes. If you are using this before a workout, add additional protein. Enjoy this Gluten Free Breakfast and find other gluten free recipes at Healthy Recipe Variations.

Screen Shot 2015-08-17 at 2.32.09 PM

Ingredients:

1 Cup Pamela’s Baking & Pancake mix

3/4 Cup of milk of your choice (I used almond milk)

1/4 Cup of water

1 Large egg

1 TBSP oil (I used coconut oil)

1 TBSP vanilla flavoring (I used vanilla flavored gluten free protein powder. You can use vanilla extract or substitute almond extract)

1/2 cup of ground flaxseed meal (I used Bob’s Red Mill)

Additional oil for the pan (I used walnut)

Screen Shot 2015-08-17 at 2.32.21 PM

Screen Shot 2015-08-17 at 2.32.30 PM

Instructions: (Makes 4-6 crepes)

Combine ingredients and remove as many “lumps” as possible

Heat the pan with a small amount of oil

Scoop 1/4 Cup of the batter and add to the hot pan. Turn the pan in a circle trying to get batter to form a thin layer on the bottom of the pan.

Use a spatula to start to lift the edges and make your way, carefully to the center. (Add additional oil of batter sticks…start conservative…add more as needed)

Carefully flip crepe. Cook 1-2 minutes on the second side.

Serve or cover with a cloth or parchment and make additional crepes.


Screen Shot 2015-08-17 at 2.32.38 PM

Screen Shot 2015-08-17 at 2.32.45 PM

Filling Suggestions:

Peanut Butter (ANY Nut or Seed Butter) and Chia Jam

Scrambled Eggs…garnish with fruit

Brie and Figs…garnish with walnuts and honey

Butter the crepe and sprinkle with powdered sugar (child’s favorite)

Fresh Fruit…garnish with Chia Jam

Cream Cheese…garnish with fresh fruit

Applesauce…sprinkle with cinnamon to garnish

Banana and Nutella…garnish with banana

Banana and Nut or Seed Butter…garnish with banana